

All this quilt business got me itching to whip-up one of my favorite instant-gratification sewing projects--coasters! Here's my recipe for making easy, attractive coasters ... they make a great hostess gift!

Step #1: Cut three 4.5-inch squares for each coaster (one square of batting, and two squares of fabric). I prefer cotton batting for this project, and like to mix things up with more than one fabric.

Step #2: Layer your two fabrics so that the right sides face each other (see above). Then layer your batting on top of that (see below).

Step #3: Sew around the perimeter using a 1/4 inch seam allowance.

Step #3, continued: Be sure to leave an approximately 1.5 inch long gap in the middle of one of the four sides (in order to pull things right-side out). See below.
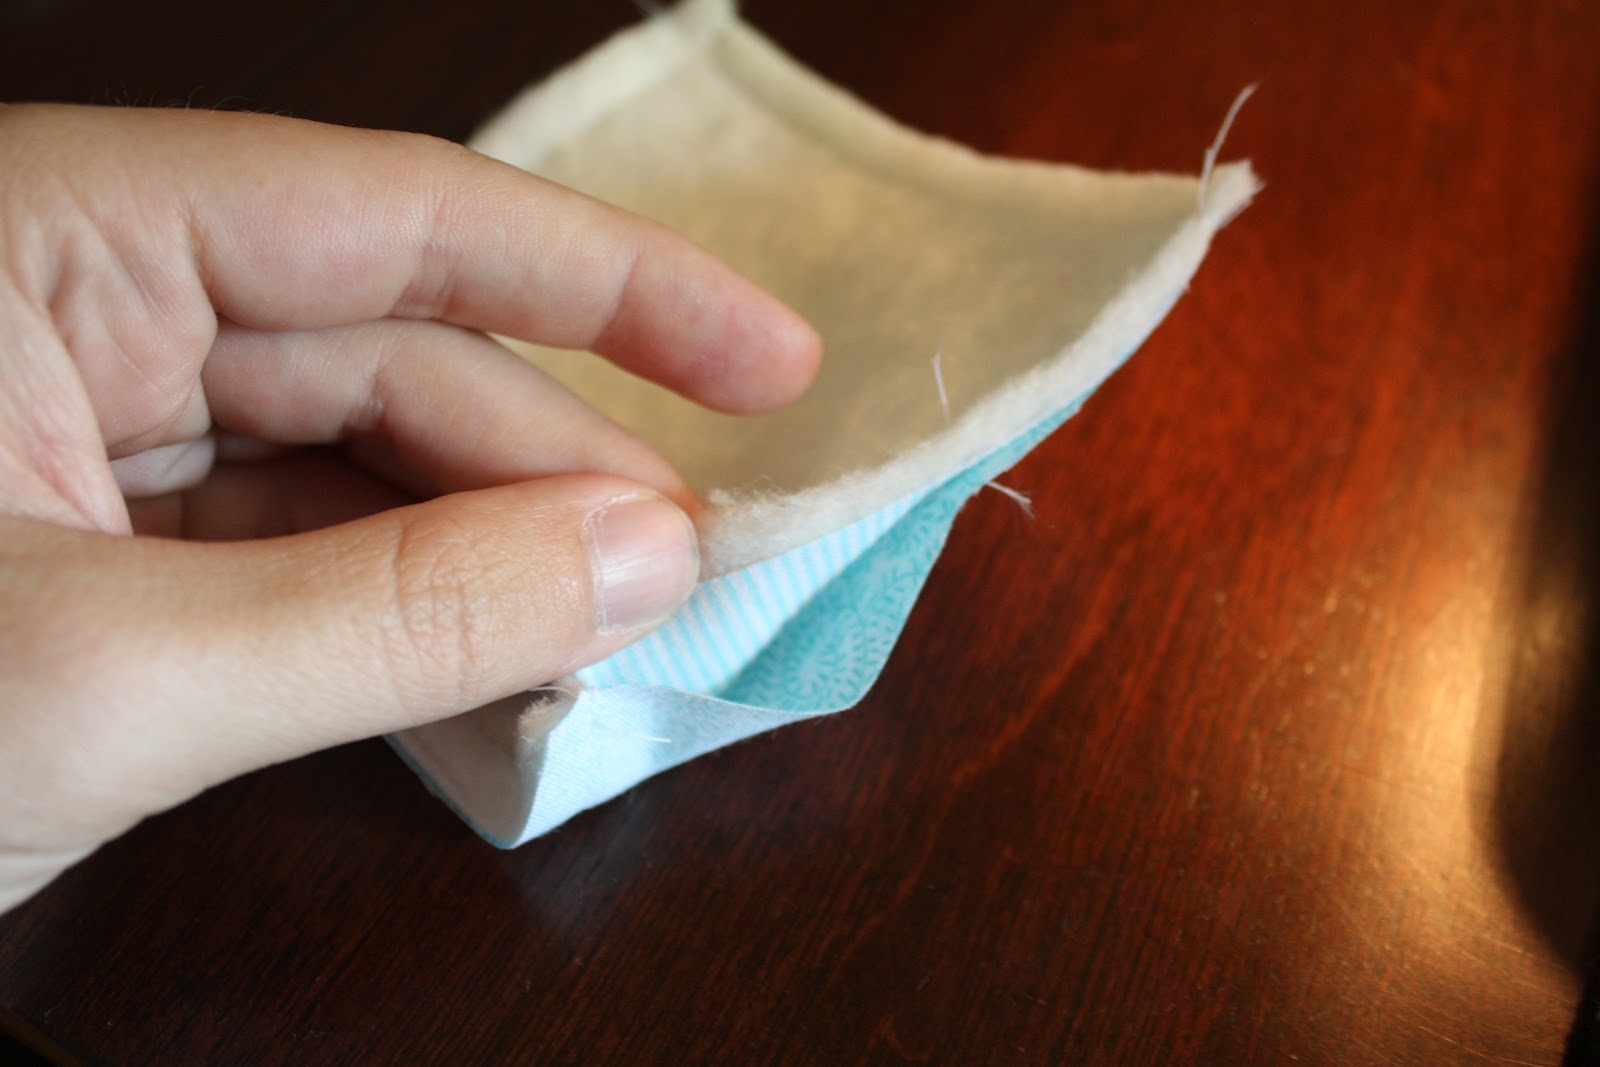
Step #4: Turn coaster right side out. Use a pencil or other pointed tip to push your corners out and square things up. Gently tuck the raw edges in around your gap (see below).

Step #5: Top-stitch approximately 1/8 of an inch from the edge around the perimeter of the coaster (this closes and secures the gap). Using your first top-stitching as a guide, stitch another interior square of top-stitching approximately 1/8 of an inch from the first line. Repeat an additional two times, or as desired.

Step #6: Enjoy your new coasters!


2 comments:
I've been seeing a lot of lovely coasters lately and have been wanting to make some, but I didn't think that I could make some that look this nice! Your fun little tutorial has made it seem much more doable, thank you.
These are lovely x
Post a Comment