Showing posts with label felting. Show all posts

giddy up!


Done! Just in time to be gifted to one lucky little girl for her birthday on Monday! I ended up using buttons for eyes--I actually stacked two buttons on top of each other to get this "eye" effect. The bottom layer is a pearly white flat, two hole button. The top layer is a shiny black button with a flat shank in the back. I am sooo happy with how this turned out! The ears are my favorite part--they look so realistic and add so much character! The pattern instructs you to attach them almost folded in half, making a triangle shape with your attachment (instead of a straight, flat seam). I think that definitely was the key to their great shape.

Yarn: Hobby Lobby I Love This Wool (1.5 skeins of Thistle and 50 yards of Pastels)

Be sure to check out the other finished objects at TamisAmis!

horsing around


My monstrously huge, floppy hobby horse head felted up fabulously! It took nearly six wash cycles (felting is the one and only time I will curse having a high-efficiency top loading machine!), even with a pair of jeans included for extra agitation.


Pre-felting measurements:
Top of forehead to end-of-nose = 14 inches
Top of forehead to beginning of neck = 11 inches

Post-felting measurements:
Top of forehead to end-of-nose = 8 inches
Top of forehead to beginning of neck = 6 inches


It didn't really look like a horse head until I added the mane and forelock. Could have gone a little longer with the mane pieces, but I figure they'll better stay out of the way of some tiny hands and fingers this way.


I used more of Hobby Lobby's "I Love This Wool" for the mane and forelock. This time I used one of their self-striping colorways, "Pastels" (the main color is "Thistle"). I  love how using the self-striping yarn gives me a multi-colored look, without the effort! Not much yardage was needed for the mane and forelock (the pattern estimates about 50 yards). I have about 1/4 remaining in each of the two skeins I used for the actual horse head.


Don't forget to check out the other WIPs at TamisAmis and YarnAlong!

felting on the fourth

unfelted hobby horse head
Happy Independence Day! We celebrated here with watermelon, sunshine, and chlorine (thanks to a dip in the pool). No fireworks this year--we're all too tired to stay awake for them! I also managed to finish knitting a new project (I have mentioned that I have crafting ADD, right? ahem ... don't worry, my lace blocks baby blanket is still progressing nicely) and get it prepped for felting.

These are the "before" photos ... I know, you must be thinking, wow ... what a giant purple sock! This giant purple sock is an unfelted hobby horse head that I'm making for my daughter's upcoming third birthday. I'm using Hobby Lobby's "I Love this Wool" held double on size 13 needles (talk about a recipe for super speedy knitting!). I need to take measurements, but this thing is ginormous. No matter how many things I felt, I still feel a little bit of doubt at this stage. It's always so hard to believe that something this humongous, floppy, and frankly, ugly is going to magically transform into something fabulous.


The plan is for this guy to make several long, hot, agitating soaks in the washing machine tomorrow. Fingers crossed that I'll have something more horsey to show you soon!

done and done!

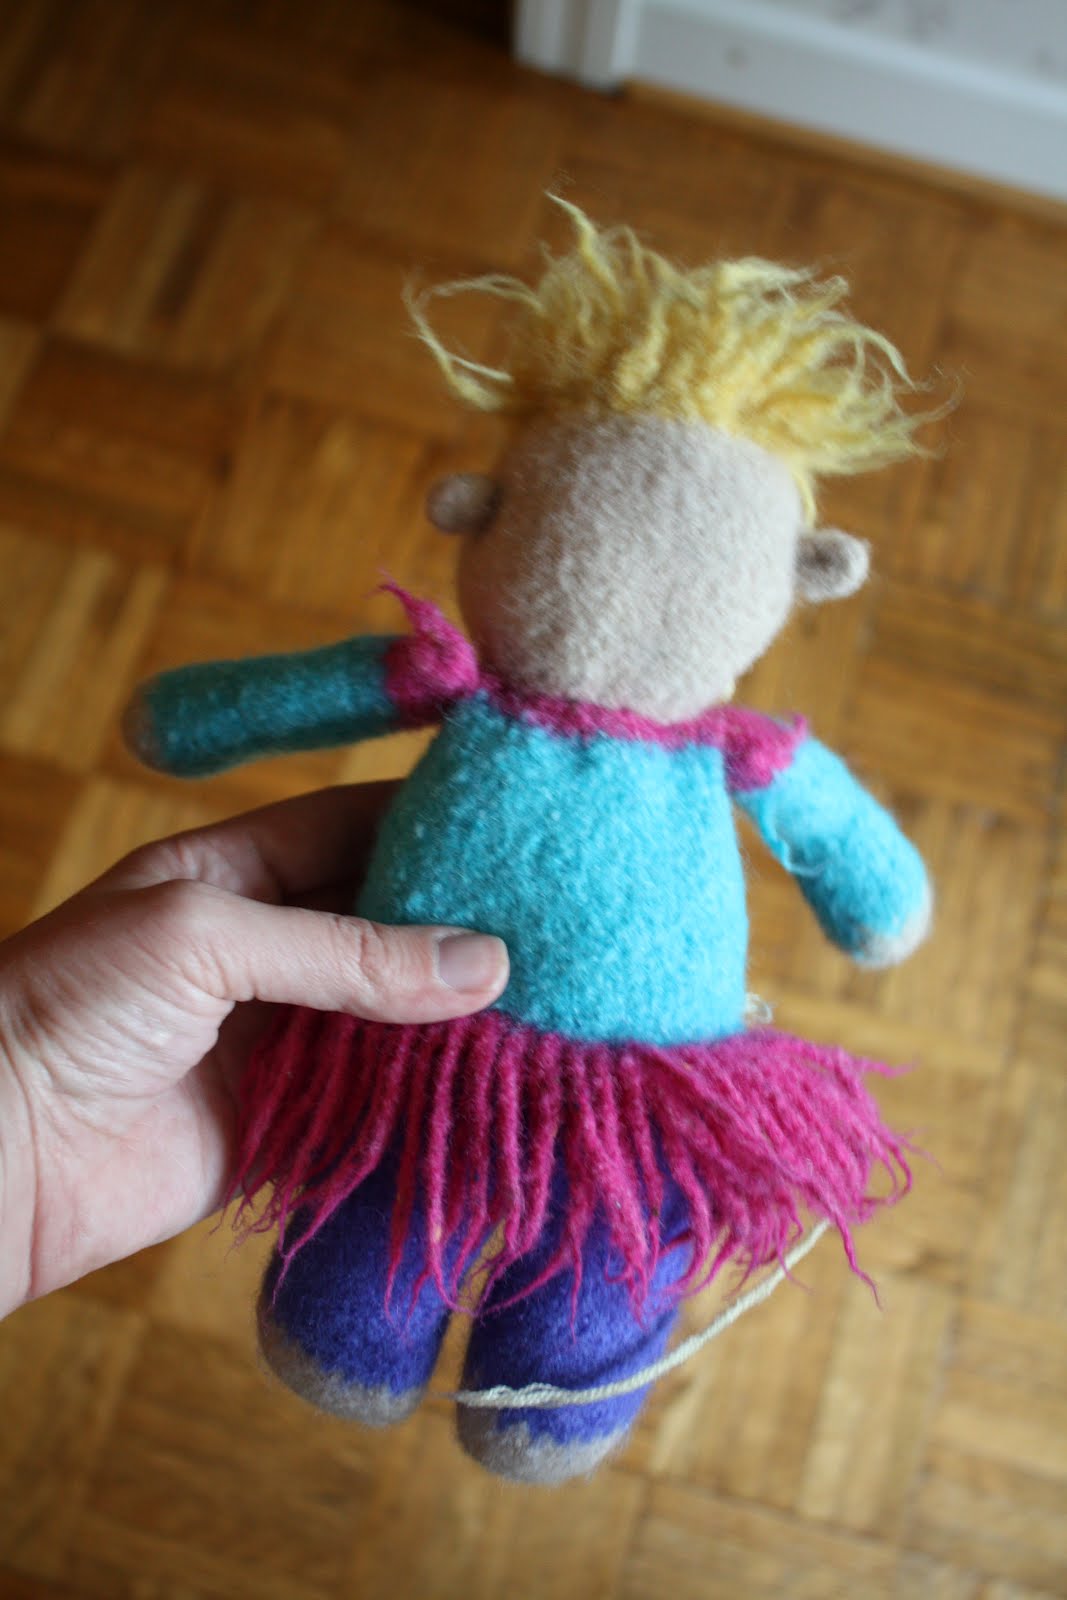
Guess who got a face and officially entered "finished object" territory? Rose, my Kuku doll! The kit provides the wool roving, and thankfully I had a needlefelting tool on hand from ages ago. I don't know what you'd do if you didn't have one, I'm not sure if it's possible to needlefelt with a regular sewing/embroidery needle ... Although I like the look of the needlefelted eyes, they were a pain to create. I felt like I was stabbing a voodoo doll obsessively! I'm just not a fan of needlefelting, I guess.

I'm even more excited to report back that the crosses quilt has also entered finished object territory! Making this quilt was step one in decorating my daughter's eventual "big girl room." I've been slowly but surely starting to scout out cute furniture options/inspirations online (see my Pinterest board) for it, and am contemplating painting the walls purple ... but this is my long-term, post-baby project. :-D

I am sooo excited by how this quilt turned out! So bright and cheerful! I found a funky orange fabric with large pink and green polka dots for my binding, which I thought was especially appropriate given the polka dot "background" fabric I used between each quilt block.

It seems like quilt-making is becoming somewhat of a pregnancy (nesting, really) tradition for me ... I was in the midst of making a king-sized quilt in my last trimester of my daughter's pregnancy. But this time, I actually finished the quilt before arrival of baby!

going kuku

I've had this adorable kit for "Rose" (one of the Kuku felted doll kits created by the Dolly-Mamas) in my stash for a couple of years now ... motivated by my desire to do some stash busting and finally try my hand at knitted toys, I cast on for Rose on Friday, and felted her in my washing machine on Monday. Can you say super-fast project? It helps that the kit uses worsted-weight Cascade 220 yarn and calls for size 9 needles!

The entire doll is knit flat, so if you fear/dislike knitting in the round, this is the knitted toy project for you! First, you start with the "feet," knitting the two legs separately and then joining them to continue knitting the torso of the body and then the head (the ears are bobbles! such a great idea!). Then you seam down the middle of the back of the doll, and attach arms that are knit separately. You stuff with poly fiber-fill prior to felting, which was the most nerve-wracking part for me ... I'm glad I had a kit, because then I really didn't have to decide how much was "too much" stuffing (the poly fiber-fill won't felt, while the rest of the doll does, so you don't want to over-stuff). I just evenly distributed the amount that was provided, and trusted the kit instructions. Lastly, you use a crochet hook to join strands of yarn for the hair and skirt. Here's Rose prior to felting ...

And after! I should have taken before and after measurements, but forgot--she really does shrink in height quite a bit! At least five inches, I would estimate.

I still need to trim extra threads, and neaten up her hair and skirt, and needle-felt some eyes. As you can see, using this method for creating hair results in a very "dread-lock" look!


Don't forget to check out the other WIPs at TamisAmis and YarnAlong!

leap of faith

I've been working on another Tapered Tote behind the scenes here over the past few weeks. This time I used Knit Picks Wool of the Andes yarn for the first time (colorway: Fairy Tale, a really pretty trendy purple). The verdict? Excellent felting yarn! It felt up much more quickly than Cascade 220, which means you should pay closer attention to your project while it's in the machine (but also means you waste less water and electricity repeatedly running your machine!). I'll definitely be using Wool of the Andes again!

Felting was one of the things that really got me into knitting, so it will always hold a fond place in my heart. No matter how many times I successfully felt a project though, I always have a moment of doubt--a moment of, "will this really work out?" Felting is always a leap of faith for me. Take the above picture, for example. This is my "before felting." What do you have before felting? A massive, misshapen, floppy bag. Frankly, a god awful, ugly bag! No matter how many times I do this, I always have a fleeting moment of fear when I see how unattractive the project is before felting.


(this project used four skeins of Wool of the Andes: here's what was left of the fourth skein when I was finished)


But somehow, like magic, it all turns out. I think that's what I love best about felting, the feeling of magic around it. That, and how felting makes all your mistakes and imperfections disappear. (for that reason alone, I will always argue that felting is a great "beginning knitter" project: no one will see your uneven tension or dropped stitches!). Here's what my project looked like after one full "whites" cycle in the washer (no other clothes/towels, in a high efficiency, no agitator machine). The bag on the left is a finished Tapered Tote made with Cascade 220 yarn. As you can see, it was almost there, but not quite complete yet. The proportions were still off after only one wash cycle.


But all it took was a "quick cycle" (approx. 30 minutes) to get it finished! Here you can see the bags now are almost identical in size.


It will never cease to amaze me that the difference of 30 minutes in a hot wash cycle will take a bag from fugly to adorable!


start-itis (WIP Wednesday)


I've come down with a huge case of start-itis this month. I think it's the realization that it's already June (cringe) and that if I want to get my huge list of crafting to-do's done this summer, I'd better get going! So right now that means a mix of fun, fast and brainless projects to grab when I want a break from the projects that require more mental energy. My favorite pattern for easy, brainless, but stunning? The knotted openwork scarf (free pattern!). It only takes one skein of mohair/silk blend, which makes it a great way to justify those so-pretty-I-must-take-you-home-but-you-are-way-too-expensive-to-justify-purchasing-more-than-one-skein moments we all sucumb to in yarn shops. With purl "rest" rows, it only looks complicated.

And my project that requires some brain power? I'm turning this swatch into a felted bag pattern. Hopefully *fingers crossed* it'll be done by the end of this month!

Summer Roundup: FOs

I may have disappeared from the blogosphere, but my needles were on fire this summer ...

My first pair of socks!


Lion Brand Yarn Sock-Ease, Rock Candy
Details on Ravelry

The Flintstones Bag


Before ....


and after!


Very Pebbles and Bamm Bamm ...

Lion Brand Landscapes, Rose Garden
Details on Ravelry

rainbow brite


Remember glimpses of a tote bag I was knitting, and nearly allowed Zoey T. Cat to annihilate? That poor project had languished, alone and forgotten, until I rediscovered it while packing for our big move. This project falls into the category of, "why did I abandon this project when it was so close to being done?" Seriously, all I really had left was binding off and making the handles ... oh well. It's done now, and happily gifted! I used Lion Brand Landscapes yarn ("prairie meadow" or something like that) and basically the same design as my pink dottie tote but with straps attached (and bigger needles and chunkier yarn). I wish I had taken a better close-up before gifting this bag, but when this yarn felts, the cloudy, mottled part of the ply melds together and the bright, vibrant part of the ply emerges–leaving bright colored flecks throughout the piece. I like the effect, but if you’re trying to avoid stitch definition, it would be difficult to achieve with this yarn. This yarn also takes much longer to felt (more wash cycles) than other wool marketed for felting projects, in my experience. I'm counting this project as my first contribution towards Project Spectrum - Air, due to the rainbow-like qualities of the finished felted fabric.

Now that it's done, I want to make another ... unfortunately, I have yet to locate a source of Lion Brand Landscapes yarn in my new locale. My local options include Wal-Mart (no luck there, ha!), a nice LYS within 30 minutes, and a Hobby Lobby within an hour (two thumbs up!). Of course I must now lust over yarn I cannot purchase locally! Sigh.


Before ...


and after!

experiencing technical difficulties

I have so much to show you, so many new projects! Alas, my camera is not cooperating. Sigh. Surf 'n Turf is DONE, buttons and all, and actually was worn a couple of times before warm weather hit, despite its late finish (thanks to this freakishly long and freezing winter/spring we're experiencing on the Palouse). A felted purse is now blocking, with an electric blue retro wedge bag waiting in the wings. And I'll be dipping into a recently enhanced bead stash soon.

Now that my mind is turning towards packing and the move to a much warmer climate, I'm dreaming of tank tops. That's right, knitted tank tops. I'm probably insane, but I'm giving it a go. In cotton-blend yarn, lest you think I've totally gone off the deep end. I'd love to splurge on some more exotic warm-weather yarns, like bamboo or linen. We'll see. I'm trying the "Mondo Cable" pattern from Chic Knits first.

Doesn't this stitch pattern look perfect for a warm-weather top? Very airy.


Image from Berroco Flex.

spotty progress


Does this bag look familiar? Yeesh. Felted in August ... and just attaching the straps now. Finishing is definitely my Achilles heel when it comes to crafting projects. I have such a long project wish list that the minute I am thisclose to finishing one project, I jump right ahead to the next. I have a recipient for this cute pink bag in mind, so it's found its way out of my UFO [un-finished object] pile. Hand-sewing the ribbon trim has been surprisingly relaxing!

an introduction is in order


Meet Zoey. Such a sweet, innocent calico cat. Riiight. Let's just say that attitude is something she's not lacking. We adopted her as a little kitten from my sister just over a year ago, and inherited the name (although I didn't object too much, it matches her spunk). Something Zoey and I share is a great love of yarn and knitting needles. Zoey, however, expresses her love much more violently than I do. Here's an example of Zoey in action ...


Don't worry, I stepped in before there was too much collateral damage. And since this project is destined for felting, it was pretty safe. My bamboo knitting needles, on the other hand, bear much more permanent scars. I swear, she can smell unsupervised knitting needles. Within milliseconds I can hear her chowing down. I am soo jealous of knitters who can leave balls of yarn, unsupervised, throughout their home. I know I can't be the only one with this problem... my solution? My works in progress stay stashed in bags hung from our coatrack or on top of a cabinet, out of Zoey's reach. Ahhh, Zoey. You sure make life interesting, don't you? :-D

Oy vey.

I am such a bad blogger! One post this month? Yikes. What's worse is that when I realized my only post was on September 1st, my first thought was, "Wouldn't it be cool to have posts only on the first and last day of the month?" (instead of being motivated to post immediately) And I've had photos of projects to write about for weeks! Yeesh. Forgive me. I'll try to get my act together.

**back to our regularly scheduled programming**

The Gator bag! Here's a photo synopsis of the process:


Before.


And after! Blocking up nicely.


See? Not so cat-in-the-hat afterall.

Once again, I decided that I liked the "purl side" of the bag better. (as seen above) The difference is slight at a distance, but you can really see it in these close-ups.


The "right side." (smooth stockinette stitch)


the "wrong side" (bumpy purl)


I like how the color transitions are more mottled with the purl-side out. The beauty of these felted bags is that they're basically reversible, so if someone liked more defined stripes, it could just be flipped back. Which look do you like prefer?

hello world, it's been awhile

      Wow. 16 years of fiber crafting statistics! This chart is deceptive because I only count "yards out" when the project is fin...