sunday's stitches

sunday's stitches: a moment to slow down and savor whatever your stitching on


I achieved my unspoken goal--finishing the sky by the end of March! Wahoo! Now I need to closely read my faded canvas and draw some lines to make finishing the white mare easier ... 

You can view my progress from week to week here.

emerald coast telemark pullover

 
We just got back from a spring break trip to the emerald coast (aka: Oregon's rugged, rocky coastline!) to visit family and fulfill a long overdue need for me to see home. (I hadn't been out to the west coast for nearly two years, thanks to bad timing and my avoidance of plane travel while preggers!) As you can see, things were more gray than emerald, but I was okay with that since that's the reality of the west coast shoreline ...
 
 
And since we spent a lot of time in the car driving up and down Highway 101, I was able to finish baby boy's telemark pullover! And unlike my shawl collar baby sweater, this one fits perfectly!


Pattern: Telemark Pullover (free Ravelry download)
Needles: Size 5 Addi Turbo's (my Ravelry project page)
Yarn: Lorna's Laces Shepherd Sport (colorway: Ascot), used 1.33 skeins
Modifications: Cast on for 18 month size, but sleeve length ended up closer to 12 month size.
 
 
The best part was that he was actually able to wear it on the trip, during a breezy hike! 
 
Baby boy wasn't the only one who lucked out on this trip ... I picked up a few goodies for myself at Cannon Beach's Coastal Yarns. One skein of MadelineTosh Sock (colorway: oceana) and my first skein of Blue Moon Socks that Rock (colorway: Purple Phantom). Coastal Yarns was a great little yarn shop--awesome selection of MadelineTosh and other great brands. Lots of great colorchanging options! If you're ever vacationing along the Oregon coast, I highly recommend making a stop!


sunday's stitches

sunday's stitches: a moment to slow down and savor whatever your stitching on


So close to finishing the sky! Next will be the part I'm dreading ... various shades of white/gray for the mare. (You can view my progress from week to week here). 

contemplating boy quilt colors


You saw a sneak peek of baby boy's big boy room when I posted the finished no-waste subway tile Christmas quilt a few weeks ago ... and now that we have the big-boy bed all set up, it needs a quilt! (nevermind the fact that it will easily be more than six months to a year before baby boy is actually sleeping in the bed ... ahem .... any excuse to make a quilt!) I'm in the fabric acquisition/contemplation stage right now ... I'm loving the orange and red combo. What I haven't decided is whether to stick with "transportation" or go the "robots" route ... we'll see!

sunday's stitches

sunday's stitches: a moment to slow down and savor whatever your stitching on


Switched to the right-hand side of the sky ... not much progress this week. (You can view my progress from week to week here). 

WIP: telemark pullover


The telemark pullover I started last week is zipping along! With any luck, I'll have this off the needles by Friday!

free quilt pattern: no-waste subway tile quilt


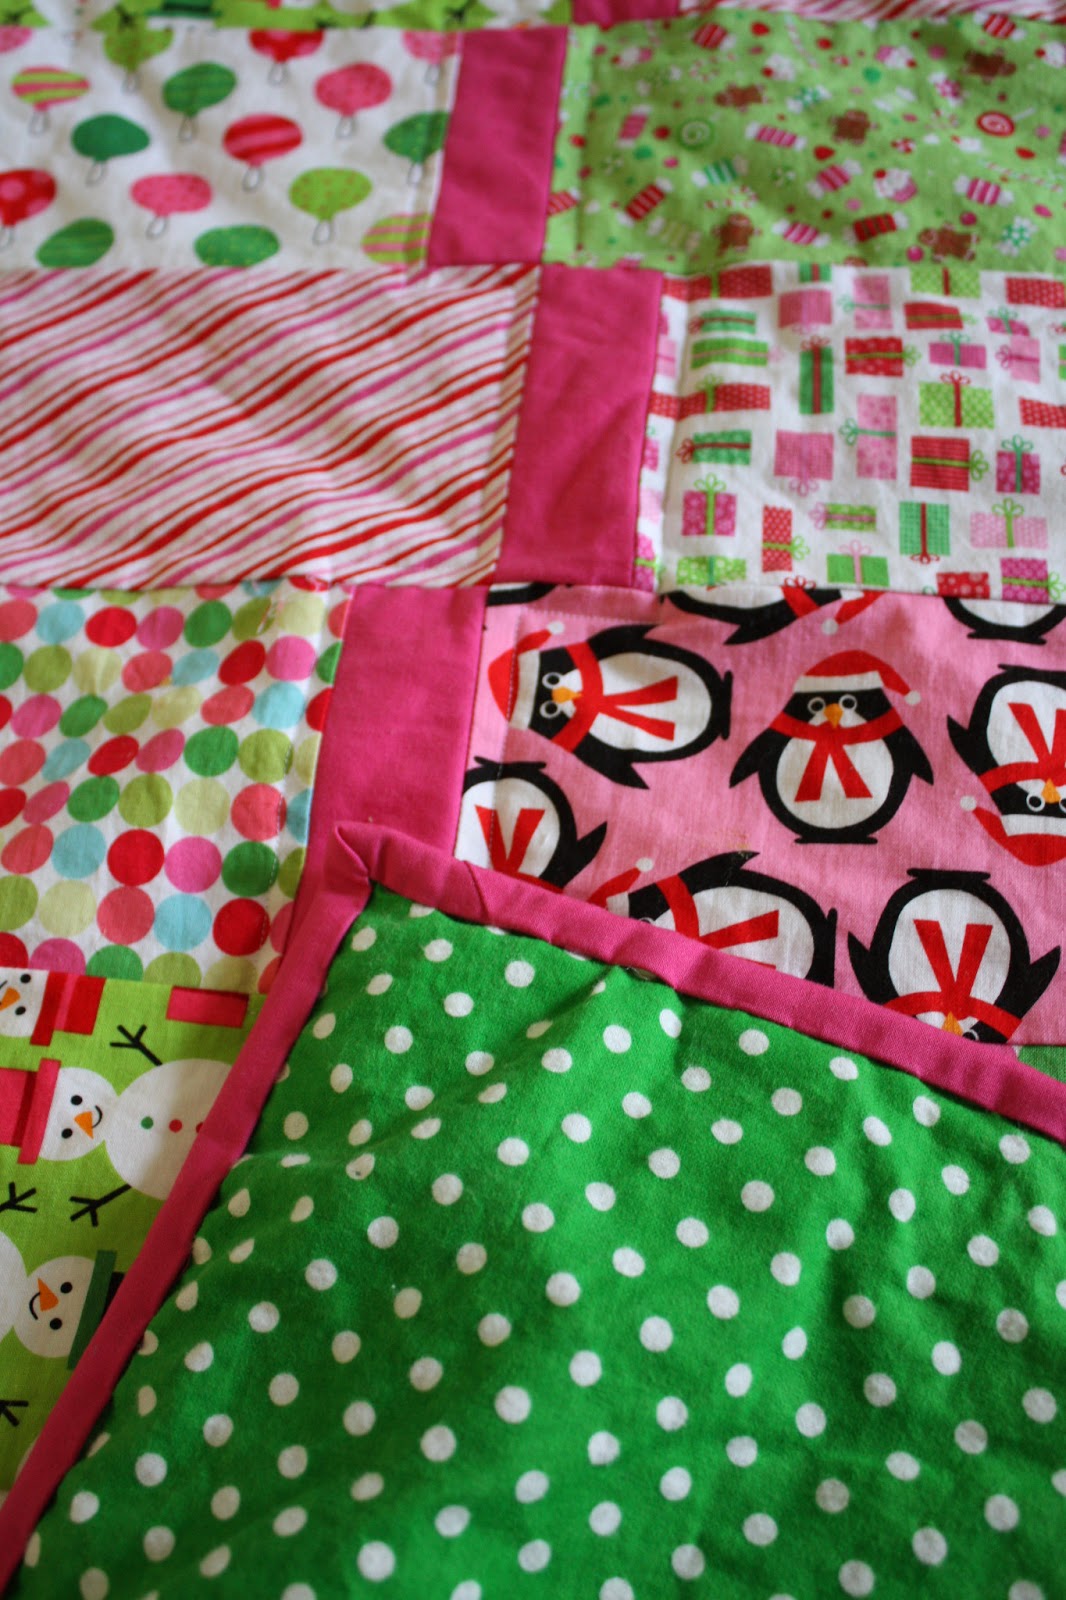
The first of the family Christmas quilts is finally done! I'm calling this the no-waste subway tile quilt pattern--I was inspired by the pattern and size of large subway tiles. And I was desperately searching for a pattern that was large enough to show off the medium- to large-sized prints I used in this quilt. Obviously, this isn't a traditional subway tile layout--I considered sticking with the traditional alignment, but that would require cutting off half a tile on the edges. I loved these fabrics so much, I didn't want to waste that much! Instead, I used the pink strips to stagger the tiles (and provide a break between these busy, busy patterns!).  I think this quilt would look great with a variety of solids as the "strips" between each subway tile.


This is a twin-sized quilt pattern (finished size: 68 x 87 inches).

What you'll need to make this quilt:
  • 3.75 yards of varied prints for your "subway tiles"
  • 2/3 yard of solid for your "strips" in between each subway tile
  • 1/3 yard for small interior border (pink polka dot in my quilt)
  • 1.25 yards for large exterior border (white background reindeer and trees in my quilt)
  • 3/4 yard for binding
  • 5.25 yards for backing

From this yardage you'll need to cut:

  • (85)     5" x 10.5" subway tiles  (I cut 5" WOF strips, and was able to get 12 tiles from one 1/2 yard of fabric)
  • (85)    5" x 2" strips to go between your subway tiles (I cut 2" WOF strips, and was able to cut 8 strips from each WOF = you'll need 11 2" WOF strips total)
  • (8)       1.5" WOF strips for small interior border
  • (8)       5" WOF strips for large exterior border
To assemble your quilt, you'll sew together rows of subway tiles (alternating each subway tile with a pink strip in between):
Row 1: start the row with a subway tile
Row 2: start the row with a pink strip
Row 3: start the row with a subway tile
Row 4: start the row with a pink strip
 And so on ... your quilt will have 17 total rows. (NOTE: this pattern uses a 1/4" seam allowance throughout)

Next, sew on the interior border (pink polka dots) and exterior border (reindeer and trees).  Then assemble your backing, quilt as desired, and attach your binding! This was a simple, fun, and fast quilt that ended up being really cheerful and happy. Christmas is a long way off, but I think this quilt will be hanging around a little bit since it makes me so happy!

2021 year in review

  Who would have thought that the second year of a pandemic would be worst than the first, in terms of crafting mojo? Not I. But this chart ...