Showing posts with label quilts. Show all posts

free quilt recipe: easy monogram baby quilt

It has been so long since I've sewn something--my best intentions to "sew something every month" have fallen by the wayside since I made that New Year's crafting goal. But when a dear friend requested something special for a newborn niece, I couldn't say no.


If you follow my Instagram feed, then you saw this quilt in progress last weekend. It came together super quickly--I pieced the top on a Friday, put the sandwich together on Sunday, and had the quilting done within four hours. With a sewn-on binding, this whole quilt took less than 12 hours. Ahhh, the speed of a crib-sized quilt with zero real piecing!

Hands down, this was the most successful and most "artistic" machine quilting I've ever done. The "M" is for Maeve. I started by taping out the M with washi tape (since that's what I had on hand). My plan was to quilt next to the washi tape, using it as my guide line. By pure luck I had picked a main fabric with a grid pattern--that helped a lot when mapping out the M. I measured the half-way point between my two vertical lines and used a ruler to eyeball equal angles on both sides. When I started quilting, the washi tape quickly detached. So I stopped and grabbed my disappearing ink embroidery pen and marked the corners of my M. Then I just used the pattern on the fabric as my guideline to create straight-ish lines. And breathed a HUGE sigh of relief when the first "M" was finished! From that point it was a lot less stressful, since I could follow my original M as my guideline. I alternated between approximately and 1/8" and 1/4" spacing for each subsequent line of the "M."

I've learned the hard way that if I don't record the details, I'll be sad later--little things like, how wide was that binding I cut? The fun part of this quilt was that it used stash fabrics--the zoo border fabric has been in my stash for almost ten years now.

Main background fabric: Heather Bailey Free Spirit fabrics, Nicey Jane Cherry Hop Dot (used approximately 1.25 yards)
Border strip fabric: Alexander Henry 2-D Zoo (used a little over 3/4 yard) 
Backing fabric: Heather Bailey Free Spirit fabrics, Nicey Jane Welcome Road (used approximately two yards)
Binding fabric: mystery hot pink and white polka dots (used approximately 1/2 yard)
Construction notes: Cut the border fabric into 7" strips. Cut binding fabric 3" wide. Used 1/2 inch seam allowances throughout. Quilted the M first, then did quilting around borders. Attached binding with 1/2" allowance from quilt edge (normally I attach at 1/4 inch allowance) with intention of wider visible binding on the front of the quilt. This did work, but left less material for sewing through on backside of quilt (and more stressful binding sewing). Next time will cut a wider binding (try 3.5 inch strip) if I attempt this again. 


Christmas quilt DOS = DONE

Sooo ... this one took me longer than planned. I was looking back at old photos, and found photos of my progress piecing together this quilt top back in March. Oops. I know I finished the top later that spring. Labor Day weekend I finished quilting it .... and now more than a month later it has a binding! The one positive? This hands down is my best job machine quilting a binding. So I don't forget for later purposes: I cut 3" strips for my binding, attached with 1/4" seam allowance like I would if hand sewing, and then slowly topstitched as close to the "ditch" as possible around. Worked like a charm!

This quilt was also my first "pieced" backing. I was economical and used leftover scraps to extend my flat sheet I was using as my backing fabric. I am actively ignoring the imperfections. The places where I have puckers and folds. Next time I'm going to try using spray adhesive and some other tricks I've read about for avoiding those problems. A walking foot would probably help too. Until then, I'm reminding myself of all the cultures that purposely craft with mistakes in their work.

Ta da! Christmas come early in this bedroom! Next up ... a king-sized Christmas quilt for my bed???

Christmas quilting


That sewing mess you saw week's ago?? It's turned into a finished quilt top! This was an easy-peasy Christmas quilt I'm making for my son. I went with four-inch wide strips and HUGE 17" square blocks so this was fun and fast. It burned through six yards of stash so far, and I haven't pieced the back yet. Yay for stashbusting! My favorite fabrics are the vintage ones I was able to include from my late grandmother's stash, especially the Santa and mini snowmen prints you see below.


Saturday sewing


When my dining room table has exploded, you know I'm sewing again .... this is destined to become a crazy Christmas quilt for my son. Oh, I've only had this planned in my head since I finished the Christmas quilt for my daughter three years ago. That's okay, this year's theme is following through on my intentions, and this is one of them!

finished cheater string quilt!


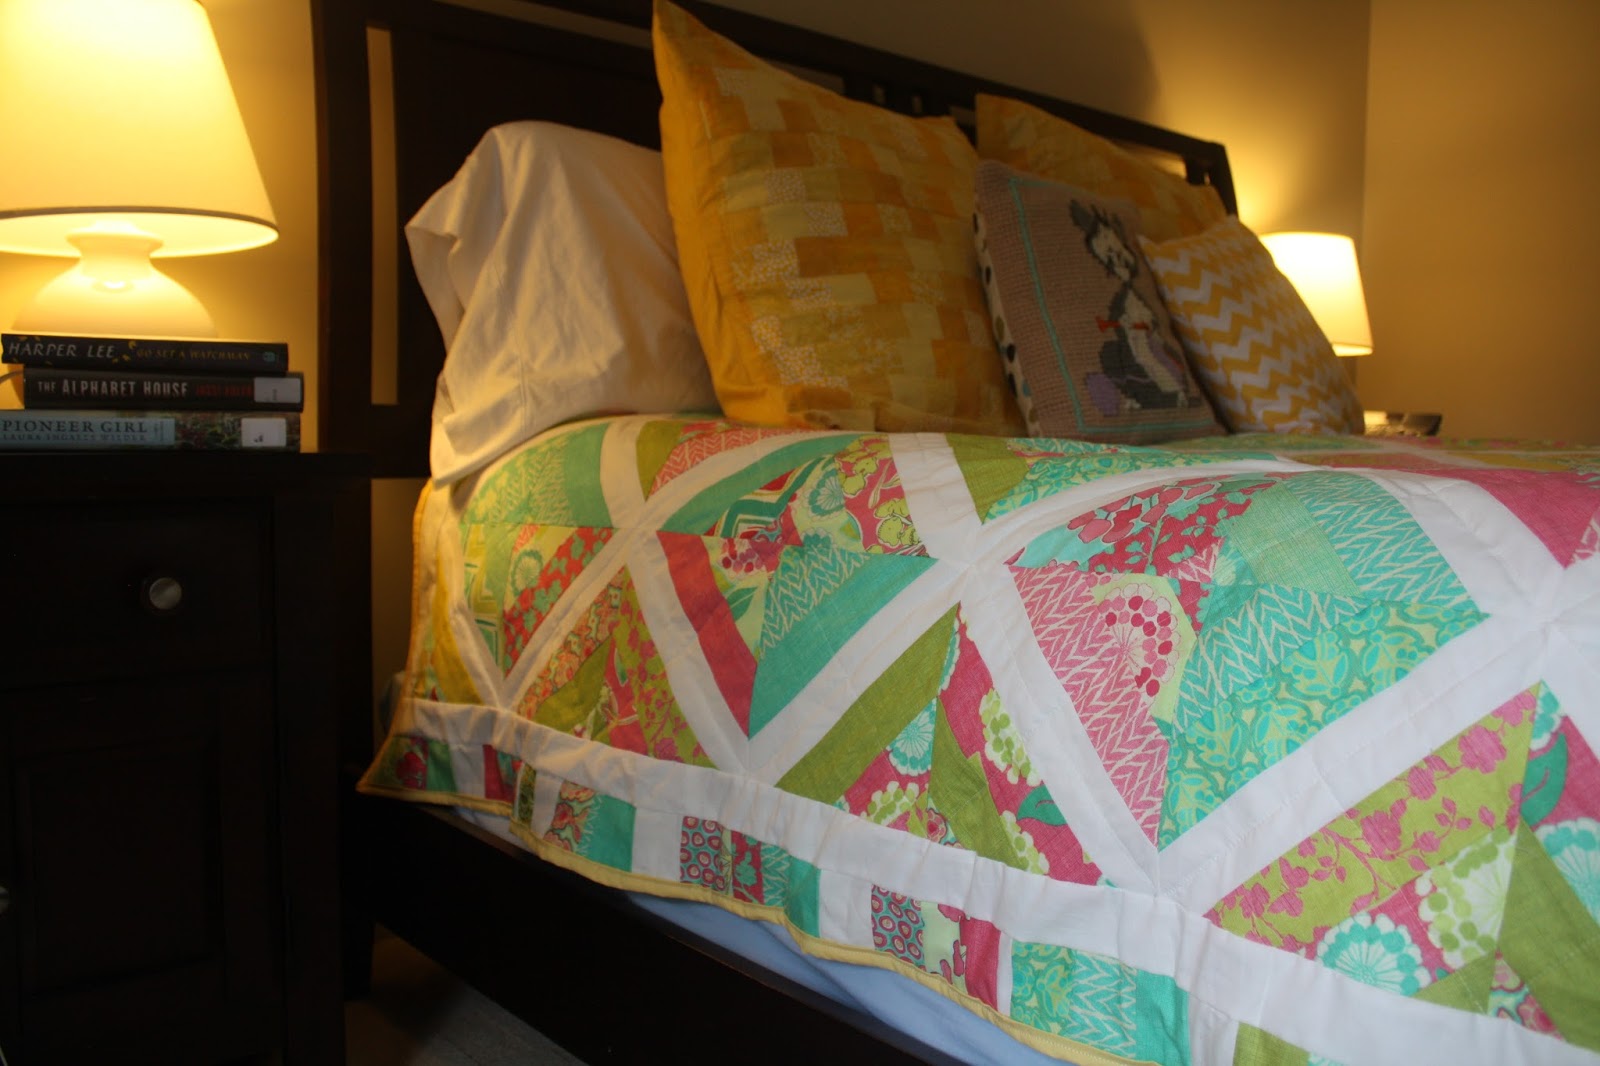
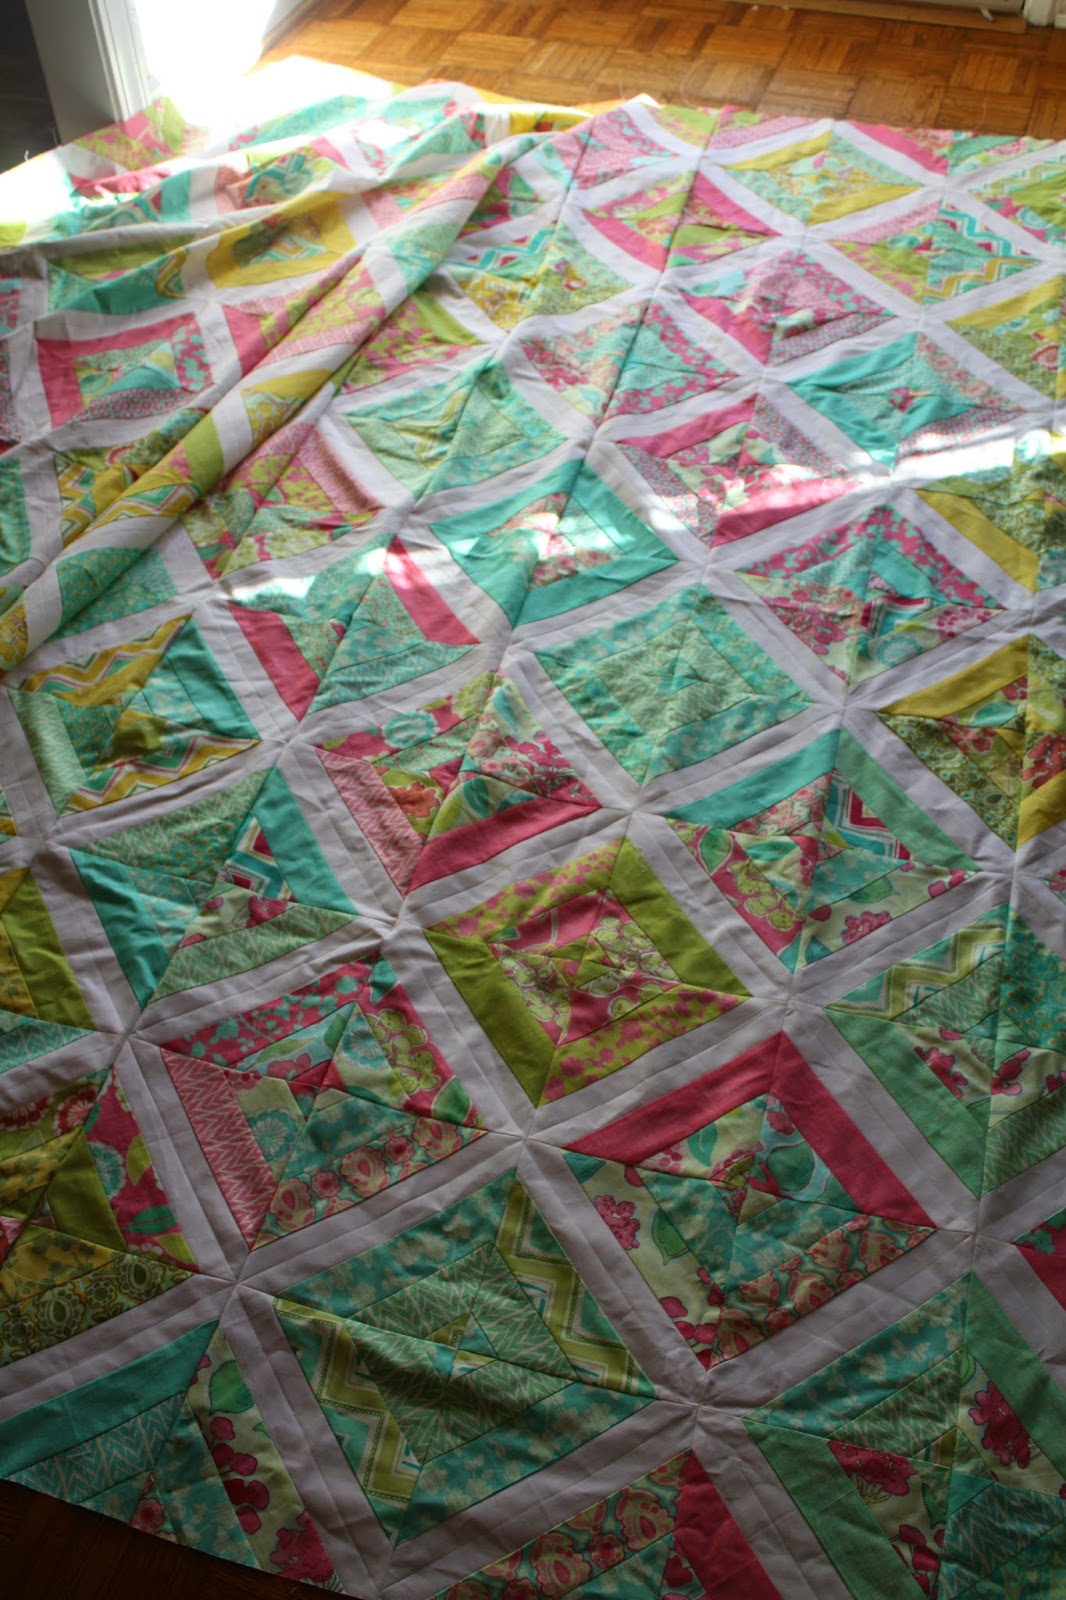
My sewing stashbusting roll continues! My cheater string quilt is officially done. This is the first time I did a machine-sewn binding, and it worked fabulously. I cut a generously sized binding, which I'm sure helped! (three inches wide, with the edges pressed to the inside at approx. 1/2 an inch)  The pattern I used is the Wishes String Quilt, a free tutorial published on the Moda Bake Shop website. It was super fun and an easy way to make a string quilt. I ended up using all three of my jelly rolls ("Spring House" from Moda) and almost two whole jelly rolls of Kona Cotton (colorway: snow). That's a lot more fabric than the pattern called for. But .... my squares ended up a little smaller and I needed more to make a generous king sized quilt, so I'm not that surprised. Love, love, love these colors. Lots of turquoise blues, yellows, pinks, and greens. Super happy colors. This is by far the prettiest quilt I've made to date! Initially I thought I'd need to make new shams for my pillows, but the old yellow ones go pretty well with the new quilt. On to my next sewing project! Next up: placemats. Lots and lots of placemats!


testing, testing 123

progress on Friday

Like I need a new WIP, right? sigh. Sometimes I just can't resist the lure of test knitting. A pretty pattern, for free?? Sign me up! As I mentioned last week, I've signed up for two test knits this month. One is almost done, and one I need to get moving on! The one that's almost done is the twining cowl by Jennifer Weissman. What I love about the pattern is that it's reversible! Normally I find garter stitch in the round annoying, but not on this project. (it helps that I'm finding this yarn--Western Sky Knits Willow DK in the lilacs colorway--to be simply gorgeous in garter!) Only have two more cable repeats and a ribbed edging to go on this one ...

progress as of today
 
But wait, there's more! Remember the blanket wrangling I did last week? I moved on to a long-neglected project, my cheater string quilt. I delusionally thought I had worked on this during the spring ... nope! Last November! Ay yi yi. Well the good news is now it is thisclose to being done! Over the weekend I pieced together a quick edging using the scraps, made the sandwhich, and did some simple straight line quilting on the diagonal. Hopefully by the end of this week I'll get the binding attached and she'll be DONE!


Last but not least, is my test knit for Brandy, the City Lights beanie. I promise to devote plenty of love to you too!


Today I'm linking up with Tammy's Stitch-Along Wednesday, Ginny for Yarn Along, and Nicole for Keep Calm Craft On.

stashbustin, the quilt edition


Just call me the finisher. After realizing in a panic at the beginning of the week that there were only TWO weeks left in July, I was determined to finish something this week. Anything. I had received a minky quilt kit from my sister for Christmas last year, and had it pulled out as something I wanted to sew up this summer. And now I'm DONE! Yes! I love fast project like this. No need to cut anything thanks to the kit, and I used up some fun yellow and gray chevron flannel I've had in my stash for easily four years now as the backing. Win and win! I ended up doing the use-your-backing-as-your-binding method on this one (first time in at least 8 years) which worked out perfectly and also sped up my finishing time.

Now for my second finish, which has been sitting since June waiting for the binding to be finished. I decided that clearly hand-sewing the binding wasn't going to happen anytime soon at this rate, and used the machine to finish the binding.


Talk about Christmas in July, eh? Next up: finishing a king-sized quilt top that just needs edging!


life lately


Life lately is looking like this for me ... big 'ol piles of blanket in my lap! Which is super ironic given how stinkin' hot this month has been. I've got my sewing machine cranked up again, and slowly moving along on my third garter squish blanket. Sooo happy with it now that I've added a couple of new colors into the mix! Also signed up for a couple of test knits in the past month that you'll see pop up here next week ...


the grinch

The grinch lap quilt has been quilted! All I have left is hand sewing the binding, my favorite part! I was worried it was too small, but we've already been cuddling under it and I was happy to see the size is perfect for that. Ready for Christmas, and it's not even July yet!

fabric stashdowning, cont.


Do you remember how I went crazy and made 18 tote bags in May? Well, I'm back at whittling down the fabric stash! This is a quick throw quilt--I bought 1.5 yards of pre-printed Grinch themed squares, so that made the decisions about this quilt easy. Simple squares! Next I need to make the quilt "sandwhich" and begin quilting ... eep!

my cheater string quilt


I mentioned awhile back that I had a quilt top in progress that had yet to be documented here on the ol' blog-o .... ta da! Here it is! This is based off a Moda Bake Shop tutorial for using jelly rolls to make a string quilt. String quilts are something I've admired for years now, so I'm super super happy to be working on this project. The jelly rolls I'm using are from the "Spring House" line of yarn from Moda. Love, love, love these colors. Lots of turquoise blues, yellows, pinks, and greens. Super happy colors. Definitely a spring feeling to it all. This quilt is for my bedroom, which means it's king-sized. I know I will regret this fact when I attempt to machine quilt it. It has been nearly six years since I made a king-sized quilt, so there you go. So far I've used three jelly rolls of the prints, and 1.5 of the white (Kona cotton in Snow? I need to double-check that). I haven't measured to see how much additional border I'll need to get the desired overall size. For now, this project is getting packed up and put on hold so I can regain use of the dining room table with holidays + company arriving soon. To be continued!


the tipping point: when your project becomes addictive

So this weekend was the cure my fall doldrums needed. Shortly after my last (whiny) post, I started to focus solely on the cowl pattern I've been test knitting this month. Suddenly, the number of repeats was getting smaller ... and smaller ... and it made me think about that moment in your project when suddenly, before you know it, the end is in sight. And if you're like me, you get a second wind and you feel re-energized. A project that used to bore you to tears is exciting again--no, more than that--it's become addictive. You can't stop working on it. All you want to do is work on it. And you feel amazing, riding this huge wave of project-success-induced momentum. Am I the only one who feels this way at the end of a project? For lack of a better term, it feels like you hit a tipping point of sorts. Up until I reach it, I tend to feel demoralized because the project feels like it. will. never. end. Clearly, I enjoy the excitement of the promise of a new project--otherwise I wouldn't have a current number of abandoned WIPs that reaches the double digits! After the initial excitement fades, I lose some interest until I reach this tipping point and I get excited by the prospect of having the yummy finished object to wear/love/enjoy.

What was amazing about this weekend was that all my projects reached tipping point status. I finished knitting and blocked the pieces of my test knit cowl:


I got past the mid-way point knitting the last border section of my Ardor shawl:


And I finished piecing and cutting the last set of quilt blocks I need to (hopefully!) finish my quilt top:

2013 year in review, continued

  1.  no-waste subway tile Christmas quilt
  2.  triangle robots in space quilt 
  3. krazy kat quilt
I would be remiss if I didn't reflect on all the other crafting I completed in 2013, which primarily consisted of quilting! I finished three quilts this year--two twin quilts and one full size quilt. And I love all of them! I'm getting more accurate with my cutting and piecing, so the quality of these quilts is much improved over past quilts I've completed.

The other project that I made a lot of progress on was an old love: needlepoint! I finally finished a horse needlepoint project I started as a teenager with my Sunday's Stitches project. All that's left is turning the finished work into a pillow (or framing it). I'm definitely going to resurrect my Sunday's Stitches weekly post in 2014--the commitment of posting once a week gave me the accountability I need to make slow but steady progress on my needlepoint projects! I have a bright and cheerful pillow kit that I'm itching to get starting on next--bright pinks, yellows, orange, turquoise flowers. It will match perfectly with the Moda jelly rolls I've acquired to make a new quilt for my bed in 2014! I also plan to continue my Christmas quilt tradition, and try the quilt-as-you-go technique while making a Christmas quilt for my son's big-boy bed. If I really go crazy, I may even try my hand at making some clothes for my daughter. But we'll see about that! 

one crazy cat quilt


The cat quilt is done! Just in time, too! This is by far the most patchwork I've ever done! Triangles? Oh my! It was fun and less fiddly than I feared, however.  The pattern is the free "kool kat kwilt" by Patti Carey, but upsized for a full size bed. To upsize it, I added another row of cats to the borders and added strips of extra cat material until I ran out. I ended up with a quilt top the size of a queen size flat sheet (which I used for my backing), so this is a generously-sized full bed quilt!


cat invasion

Lately my house feels like a cat factory! The cat quilt is progressing nicely ... now I need to finalize my layout so I can finish the cat tail blocks.

meow!


You didn't think I could let my sewing machine rest too long, did you? Hot on the heels of my finished robots and rockets triangle quilt, I'm back at it again ...

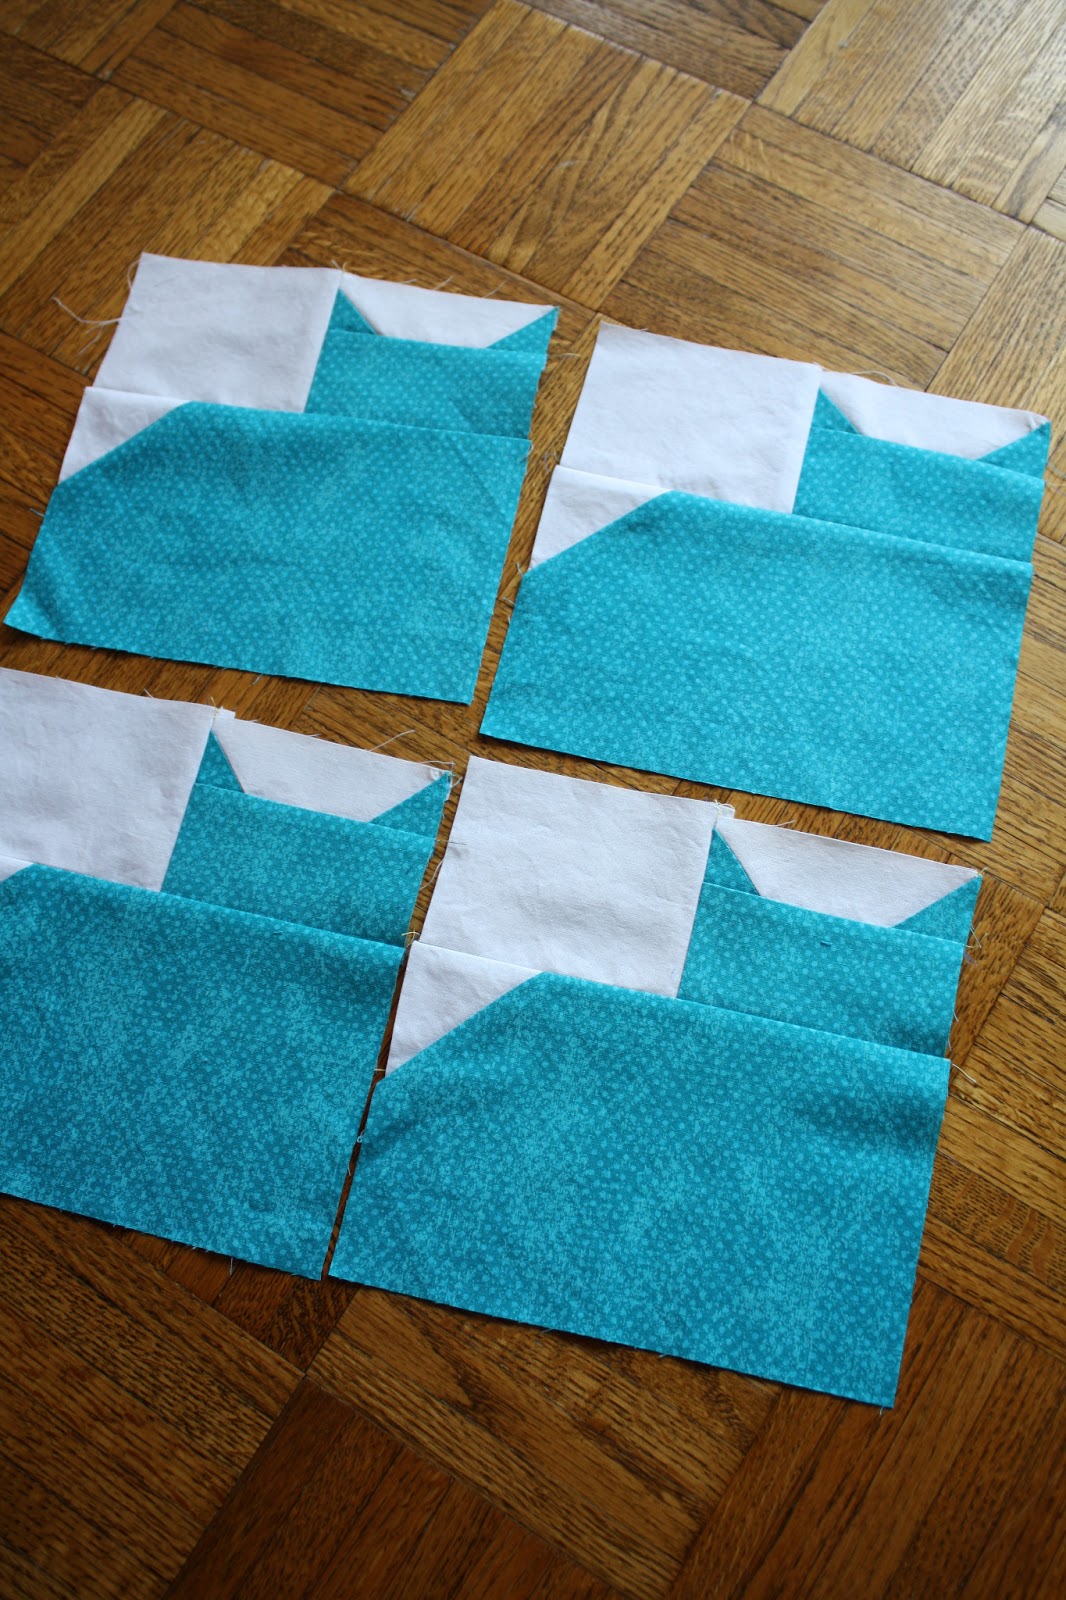
This time it's a quilt for my sister's first off-campus apartment ... a cat quilt, that is! When I saw the pattern for the Kool Kat Kwilt I sooo could not resist. It's the most complicated piecing I have attempted to date ... so far, so good when it comes to the cats themselves. I'm a little intimidated by the interlinked tail block. I'll just have to try one and see how it goes! Worst case scenario, I'll just tile lots and lots of cat blocks!

finito! completed triangle quilt

You can't see the binding very well in this shot, but I used the same orange/red/yellow stripe from the body for my binding ... sooo happy with how this turned out! Another major portion of baby boy's "big boy" room is now complete!

quilting triangles


The top is done ... quilting and all! Now on to my favorite part, the binding ...


robots and rockets boy quilt

Remember when I was contemplating boy quilt colors back in March? I finally settled on .... robots and rockets! This is my first attempt at quilting with equilateral triangles ... my points aren't perfect, but I still love it! I should have the top finished soon ...


contemplating boy quilt colors


You saw a sneak peek of baby boy's big boy room when I posted the finished no-waste subway tile Christmas quilt a few weeks ago ... and now that we have the big-boy bed all set up, it needs a quilt! (nevermind the fact that it will easily be more than six months to a year before baby boy is actually sleeping in the bed ... ahem .... any excuse to make a quilt!) I'm in the fabric acquisition/contemplation stage right now ... I'm loving the orange and red combo. What I haven't decided is whether to stick with "transportation" or go the "robots" route ... we'll see!

hello world, it's been awhile

      Wow. 16 years of fiber crafting statistics! This chart is deceptive because I only count "yards out" when the project is fin...