Showing posts with label sewing. Show all posts

free quilt recipe: easy monogram baby quilt

It has been so long since I've sewn something--my best intentions to "sew something every month" have fallen by the wayside since I made that New Year's crafting goal. But when a dear friend requested something special for a newborn niece, I couldn't say no.


If you follow my Instagram feed, then you saw this quilt in progress last weekend. It came together super quickly--I pieced the top on a Friday, put the sandwich together on Sunday, and had the quilting done within four hours. With a sewn-on binding, this whole quilt took less than 12 hours. Ahhh, the speed of a crib-sized quilt with zero real piecing!

Hands down, this was the most successful and most "artistic" machine quilting I've ever done. The "M" is for Maeve. I started by taping out the M with washi tape (since that's what I had on hand). My plan was to quilt next to the washi tape, using it as my guide line. By pure luck I had picked a main fabric with a grid pattern--that helped a lot when mapping out the M. I measured the half-way point between my two vertical lines and used a ruler to eyeball equal angles on both sides. When I started quilting, the washi tape quickly detached. So I stopped and grabbed my disappearing ink embroidery pen and marked the corners of my M. Then I just used the pattern on the fabric as my guideline to create straight-ish lines. And breathed a HUGE sigh of relief when the first "M" was finished! From that point it was a lot less stressful, since I could follow my original M as my guideline. I alternated between approximately and 1/8" and 1/4" spacing for each subsequent line of the "M."

I've learned the hard way that if I don't record the details, I'll be sad later--little things like, how wide was that binding I cut? The fun part of this quilt was that it used stash fabrics--the zoo border fabric has been in my stash for almost ten years now.

Main background fabric: Heather Bailey Free Spirit fabrics, Nicey Jane Cherry Hop Dot (used approximately 1.25 yards)
Border strip fabric: Alexander Henry 2-D Zoo (used a little over 3/4 yard) 
Backing fabric: Heather Bailey Free Spirit fabrics, Nicey Jane Welcome Road (used approximately two yards)
Binding fabric: mystery hot pink and white polka dots (used approximately 1/2 yard)
Construction notes: Cut the border fabric into 7" strips. Cut binding fabric 3" wide. Used 1/2 inch seam allowances throughout. Quilted the M first, then did quilting around borders. Attached binding with 1/2" allowance from quilt edge (normally I attach at 1/4 inch allowance) with intention of wider visible binding on the front of the quilt. This did work, but left less material for sewing through on backside of quilt (and more stressful binding sewing). Next time will cut a wider binding (try 3.5 inch strip) if I attempt this again. 


Christmas felt ornaments


In following with this year's theme of "follow through," I thought I'd make something I've been intending to make for years now: hand-sewn felt ornaments! I can't tell you how many of these projects I've pinned on Pinterest over the years. The peace sign and heart are my own free-hand designs, and the angel pattern is from the Bugs and Fishes blog. These were so much fun that I'm sure I'll be making more--which is good, since I have quite a bit of felt in my stash to burn through!


Christmas quilt DOS = DONE

Sooo ... this one took me longer than planned. I was looking back at old photos, and found photos of my progress piecing together this quilt top back in March. Oops. I know I finished the top later that spring. Labor Day weekend I finished quilting it .... and now more than a month later it has a binding! The one positive? This hands down is my best job machine quilting a binding. So I don't forget for later purposes: I cut 3" strips for my binding, attached with 1/4" seam allowance like I would if hand sewing, and then slowly topstitched as close to the "ditch" as possible around. Worked like a charm!

This quilt was also my first "pieced" backing. I was economical and used leftover scraps to extend my flat sheet I was using as my backing fabric. I am actively ignoring the imperfections. The places where I have puckers and folds. Next time I'm going to try using spray adhesive and some other tricks I've read about for avoiding those problems. A walking foot would probably help too. Until then, I'm reminding myself of all the cultures that purposely craft with mistakes in their work.

Ta da! Christmas come early in this bedroom! Next up ... a king-sized Christmas quilt for my bed???

sewing up a monster laundry hamper


I have to admit, after seeing this project on the Martha Stewart website I really wanted to make one ASAP.  But I did do some internet searches for "cute hampers" before giving myself permission to place my order for this kit at Spoonflower. You'll get one piece of fabric with all the components printed on it (see below). It's hard to see in this picture, but there's even lines to guide you when cutting each piece out with your seam allowance already built in. The directions are even printed on the fabric! Super easy and fast--it took me all of two hours to make this, even including the time to cut out each piece.


Ta da! Monster ready to eat some delicious dirty laundry (the opening is the mouth)!
 

The kit even includes a smaller screenprint of the monster, suitable for sewing up a "baby monster" stuffy. Now to see if it motivates my kids to pick up their dirty laundry ...


curtain crazy, part 2


So, my kitchen windows have remained "undressed" for years ... I never wanted to block the view of my backyard or any light! But since I caught a curtain sewing fever, it made me reconsider the idea of adding a little pop of color in the kitchen.  So this is my second curtain project using printed cotton duck. These curtains are kind of like valences, I guess--they sit on a tension rod inside the top of each window. I only had one yard of the print that best matched my kitchen, so I cut it in half and found a print to use for the back side that I would enjoy when I'm on my patio looking toward the house. I wanted a curved edge to make it a little interesting, so I carefully made myself a pattern. Then I hemmed the bottom curved edge including pom pom trim along the way (my favorite part!), and then sewed the top seam. Pressed the bottom seam, and done! So these used up two yards of fabric total.

view from outside

pom poms!

And in my last fit of curtain making, I tried something different for the window in our big family room. I wanted something even shorter to better be able to see the backyard. And this print had a fun design to it, so I thought I'd let the design dictate the shape. I'm not 100% convinced on this one. Sometimes I adore it, and other times I think it looks comically too tiny. But for now it stays! Another yard out of the stash.


curtain crazy, part 1


I don't know what it is, but once spring semester finishes and I'm in "summer mode" I start sewing like crazy again. Remember last May, when I sewed 18 tote bags and used up 36 yards of fabric stash? Well, I'm still working on that same large stash of printed cotton duck. I knew I wanted to use it for some home dec type projects, like recovering cushions and things like that. But when the spring inside my bedroom roller shade curtain broke, I realized I could change the fabric when I replaced it (besides, it was really shabby looking thanks to holes in the shade my cat had made (see below)). It dawned on me that I could use my cotton duck fabric for curtains! And then I got excited. So this is project number one on my recent curtain overhaul.


And this is the after! The side curtains were the easiest part, since I got rings that had a clip on them. So all I needed to do was hem the raw edges. This is approximately 2.5 yards of fabric cut in half lengthwise. Since the roller shade provides the privacy, the long curtains are decorative only and didn't need to actually cover the entire width of the window. I didn't line them, since I want as much light as possible to filter in--and I love how the flowers really stand out when they are backlit. The roller shade was more of an adventure. Primarily in getting it trimmed to the correct size. I purchased a cheap roller shade at my local Lowe's, and they will custom trim it for you .... except at my store the trimming machine was broken. So I had to drive to a neighboring city to get it cut down to size. When I brought it home, I realized it was still too long to fit in the existing brackets. Grrrrrr. This I actually attribute more to my measuring error. Having watched the Lowe's employee pop out the fittings, I felt confident enough to take about the shade and trim it down myself the additional 1/8 of an inch with a box cutter. Finally, it fit! So I ripped off the cheap plastic blind it comes with and used double-sided tap to attach my fabric shade. And now I realize it's not quite perfectly straight. So I'll be taking it down again to adjust that, but otherwise I love it! So much more cheerful, and so much more "my style" to have flowers and color in the bedroom.


Christmas quilting


That sewing mess you saw week's ago?? It's turned into a finished quilt top! This was an easy-peasy Christmas quilt I'm making for my son. I went with four-inch wide strips and HUGE 17" square blocks so this was fun and fast. It burned through six yards of stash so far, and I haven't pieced the back yet. Yay for stashbusting! My favorite fabrics are the vintage ones I was able to include from my late grandmother's stash, especially the Santa and mini snowmen prints you see below.


more belated finishes

February was a lot more productive than my blog would let on ... here's a couple of more finishes that never got posted about! Above was a quick set of placemats for my sister's birthday. These ones I didn't do a binding on to speed things up--instead I basically followed the same steps as my quilted coaster tutorial, but with the fabric cut to 16x20 inch dimensions. Then I had fun quilting them in rectangular labyrinths. I used two yards of fabric to make four placemats, and now I know it takes about half a yard to get two "sides." I think this is my new favorite way to construct them!

Does the cabling on this hat look familiar? It's the hat version of the cowl I test knitted in February! A fun and easy way to use another skein of Malabrigo from my stash!

Saturday sewing


When my dining room table has exploded, you know I'm sewing again .... this is destined to become a crazy Christmas quilt for my son. Oh, I've only had this planned in my head since I finished the Christmas quilt for my daughter three years ago. That's okay, this year's theme is following through on my intentions, and this is one of them!

2015 sewing year-in-review

I'd be remiss if I didn't do a post taking a look back at all the sewing I did in 2015.

  • 18 tote bags (that's 36 yards of fabric!!)
  • two lap quilts and one king-size quilt (!!)
  • 8 pairs of pants for the kiddo (that's 8 yards of fabric)
Next year will be the year of the quilt. I have plans to make a Christmas quilt for my son, a Christmas quilt for my own bed, and a couple of flannel winter quilts for the kiddos. I'm also thinking placemat marathon and finally make my own knitting project bags (with zippers!) for further stashbusting purposes.

christmas catch-up

One last thing I finished on Christmas eve, just in time to wear that night! Three pairs of pajamas for the kiddo, using the same pattern I used to make her school pants. That's now eight different pairs of pants I've made with that pattern--I've definitely got my money's worth!

a teeny tiny finish


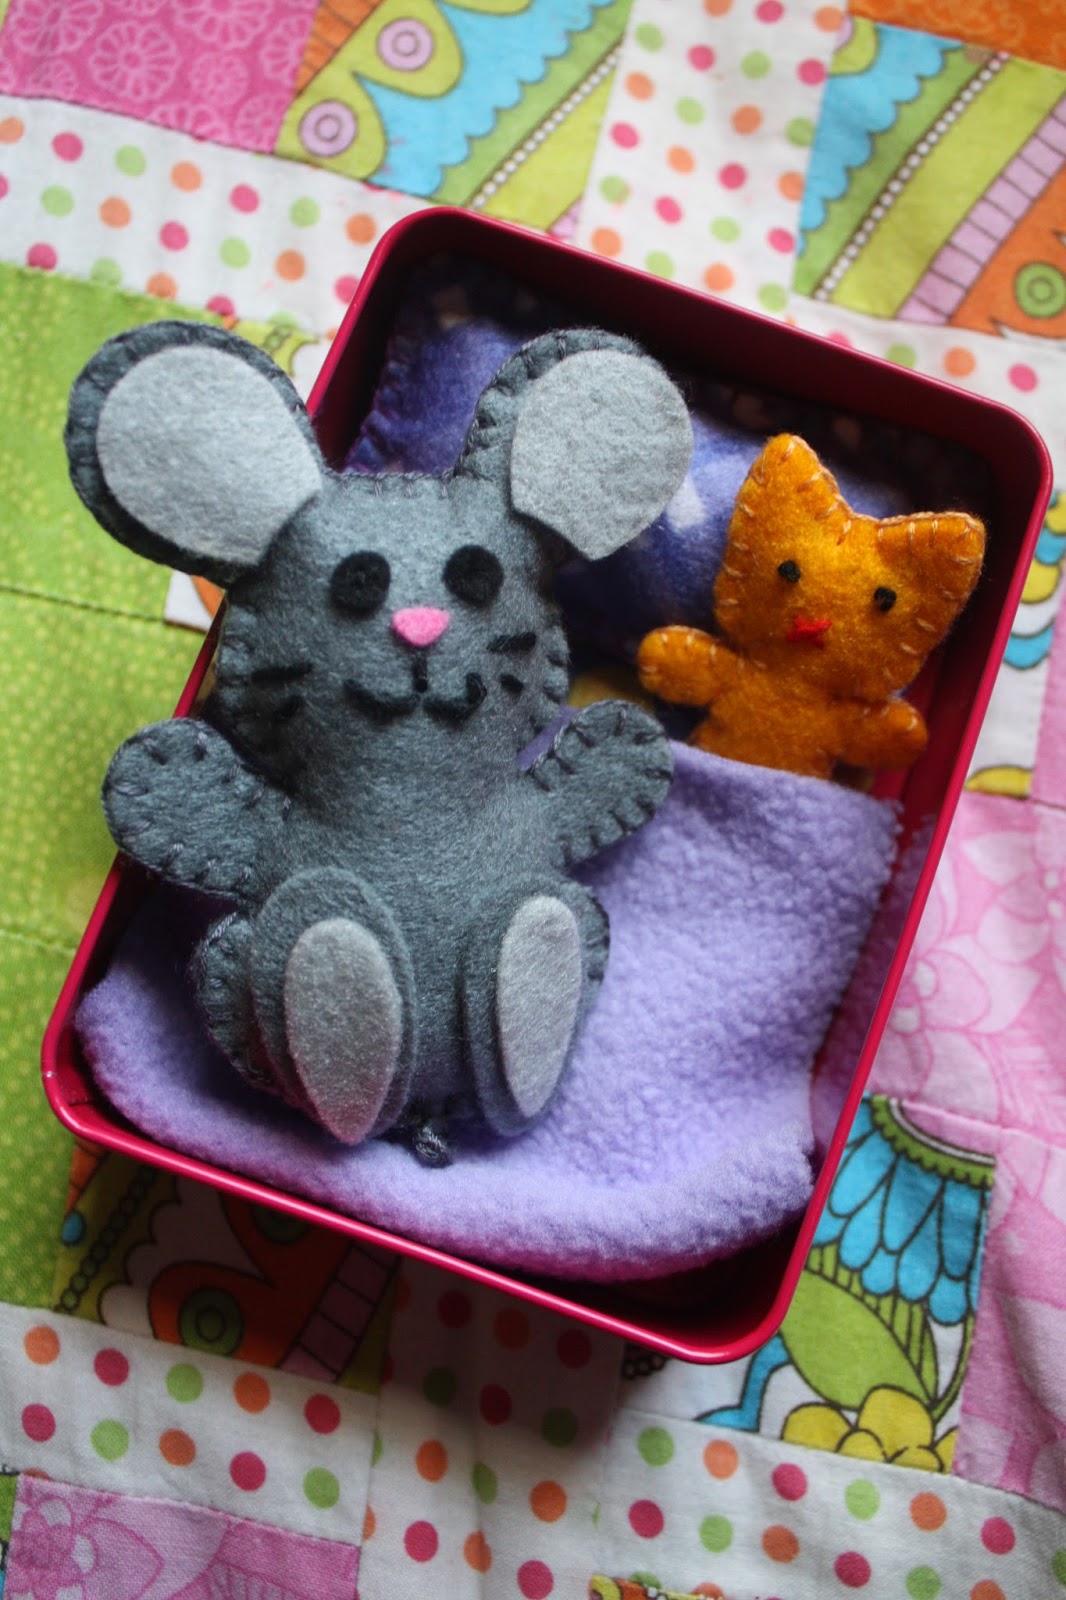
I've always adored those altoid-tin mouse bed kits you see floating around on Pinterest. So when I was in Hobby Lobby and found a pre-cut kit to make one, all materials already assembled, I jumped on it. So stinkin' cute and super fast! You'll see another version soon ...

Love Your Library, vol. 29


Technically this was finished on Black Friday back in November. Oops. She's worn this multiple days to school now, so I can count this one as a success! My mission was to make a uniform-compliant sweater in a non-boring (read: black or white) color. So Yellowjacket yellow it was!

Pattern: basic raglan sweater - child by Ann Budd (from The Knitter's Handy Book of Top-Down Sweaters)
Yarn: Yarn Bee Soft Secret Solids (colorway: butter)
Needles: size 7 and size 4 for ribbing/button bands
Mods: none! I've knit this pattern before, but this time I followed the v-neck cardigan instructions.


And to slip in some sewing "love your library" progress, I finished up three more uniform-compliant pants over the Thanksgiving break as well! Just in time, too, as we had a cold snap hit right when everyone returned from the holiday. You'll see this pattern pop up again at some time this month, as I have a set of three different flannel pajama pants cut using this pattern as well!
 

sewn from Pinterest: easy lined drawstring bag


If you're like me your Pinterest boards are filled with infinitely more projects than you could ever make in a single lifetime. I keep posting cute sewing projects, and finally I made one! This is my first easy lined drawstring bag made with the tutorial by Jeni Baker. Awesome tutorial, and super easy--just as advertised! I would totally use this tutorial as the basis for making future lined drawstring bags. The only downfall? It's a pretty small bag if you make it using the tutorial dimensions. It would work for a sock knitting bag, but that's about it! So next time I would upsize it, which would be really easy to do. This is also a great project for using up leftover yardage from other sewing projects.

stashbustin, the quilt edition


Just call me the finisher. After realizing in a panic at the beginning of the week that there were only TWO weeks left in July, I was determined to finish something this week. Anything. I had received a minky quilt kit from my sister for Christmas last year, and had it pulled out as something I wanted to sew up this summer. And now I'm DONE! Yes! I love fast project like this. No need to cut anything thanks to the kit, and I used up some fun yellow and gray chevron flannel I've had in my stash for easily four years now as the backing. Win and win! I ended up doing the use-your-backing-as-your-binding method on this one (first time in at least 8 years) which worked out perfectly and also sped up my finishing time.

Now for my second finish, which has been sitting since June waiting for the binding to be finished. I decided that clearly hand-sewing the binding wasn't going to happen anytime soon at this rate, and used the machine to finish the binding.


Talk about Christmas in July, eh? Next up: finishing a king-sized quilt top that just needs edging!


life lately


Life lately is looking like this for me ... big 'ol piles of blanket in my lap! Which is super ironic given how stinkin' hot this month has been. I've got my sewing machine cranked up again, and slowly moving along on my third garter squish blanket. Sooo happy with it now that I've added a couple of new colors into the mix! Also signed up for a couple of test knits in the past month that you'll see pop up here next week ...


the grinch

The grinch lap quilt has been quilted! All I have left is hand sewing the binding, my favorite part! I was worried it was too small, but we've already been cuddling under it and I was happy to see the size is perfect for that. Ready for Christmas, and it's not even July yet!

fabric stashdowning, cont.


Do you remember how I went crazy and made 18 tote bags in May? Well, I'm back at whittling down the fabric stash! This is a quick throw quilt--I bought 1.5 yards of pre-printed Grinch themed squares, so that made the decisions about this quilt easy. Simple squares! Next I need to make the quilt "sandwhich" and begin quilting ... eep!

FO Friday: tote-ally crazy

It's official: I've gone tote-ally crazy with this project! But man, does it feel good. Final count: 18 tote bags finished. That's 36 yards of fabric out of my stash people! Happy dance!! The sad thing is that I could easily make at least ten more of the remaining cotton canvas stash. However, I'm going to take a break for now. I have a couple of other ideas as to how I can utilize what remains (e.g. new cushion covers for patio furniture, placemats, maybe even some curtains) that I want to think about for a bit first. Phew! What's next? Quilts. I've got a king-sized quilt top super close to being finished, and some throw-sized quilts ready to get started.

FO Friday: still going ...


My progress continues! The fabric above finally uses up the six-year-old stash from my sewing class (look familiar?)


hello world, it's been awhile

      Wow. 16 years of fiber crafting statistics! This chart is deceptive because I only count "yards out" when the project is fin...