big needle knit afghans: lace block baby blanket


Drum roll please ... the lace blocks baby blanket is done! (if you could only see the happy dance I'm doing right now!) I mentioned this in previous posts on this project, but this pattern knits up fast. Seriously fast. I really enjoyed this project, and I predict this pattern will become my new go-to-pattern when I need a quick knit baby gift. This is one of my favorite types of patterns--super easy, but with deceptively complicated looking results. Each row is a simple repeat that combines garter stitch blocks with yarnovers and K2tog's or SSK's. That's it! The leaning nature of the decreases is what makes the garter stitch blocks have alternating directions. I also love how you end up with a gentle zig zag edge.

To recap, here are the details:

Pattern: Lace Blocks Baby Blanket by Diane Zangl (published in the book "Big-Needle Knit Afghans")
Yarn: Caron Simply Soft Eco (249 yards per skein, I used four skeins)
Needles: size 10 Addi Turbo's
Finished dimensions: 49 inches long by 35 inches wide
Modifications: I skipped the crochet border, and didn't block.


Now I need to keep this momentum going and finish the other two projects on my must-finish-this-month list! What are you working on? Be sure to check out the other WIPs at TamisAmis and YarnAlong!

sew cute

 
Last month, I dusted off my sewing machine to make these pillows for my sister and totally fell in love with this color combo ... so much in love, that I managed to scrap together a tote bag out of the leftover material! 
 
 
I love how cheerful it is! Have a great weekend!

holding pattern

August came and went in a whirlwind ... between a last chance, end-of-summer beach trip and the craziness that comes with the beginning of fall semester in a university town, my energy for knitting plummeted. I have two blanket projects that have been creeping along that I'm determined to finish this month--that way I can have my slate clear for holiday knitting and a pair of socks for Soctoberfest  next month! That's the plan anyway ... 
 
 
Since you've last seen the progress on my lace blocks blanket, I've finished another half a skein ... two more skeins to go (approx. 300 yards). The end is in sight!


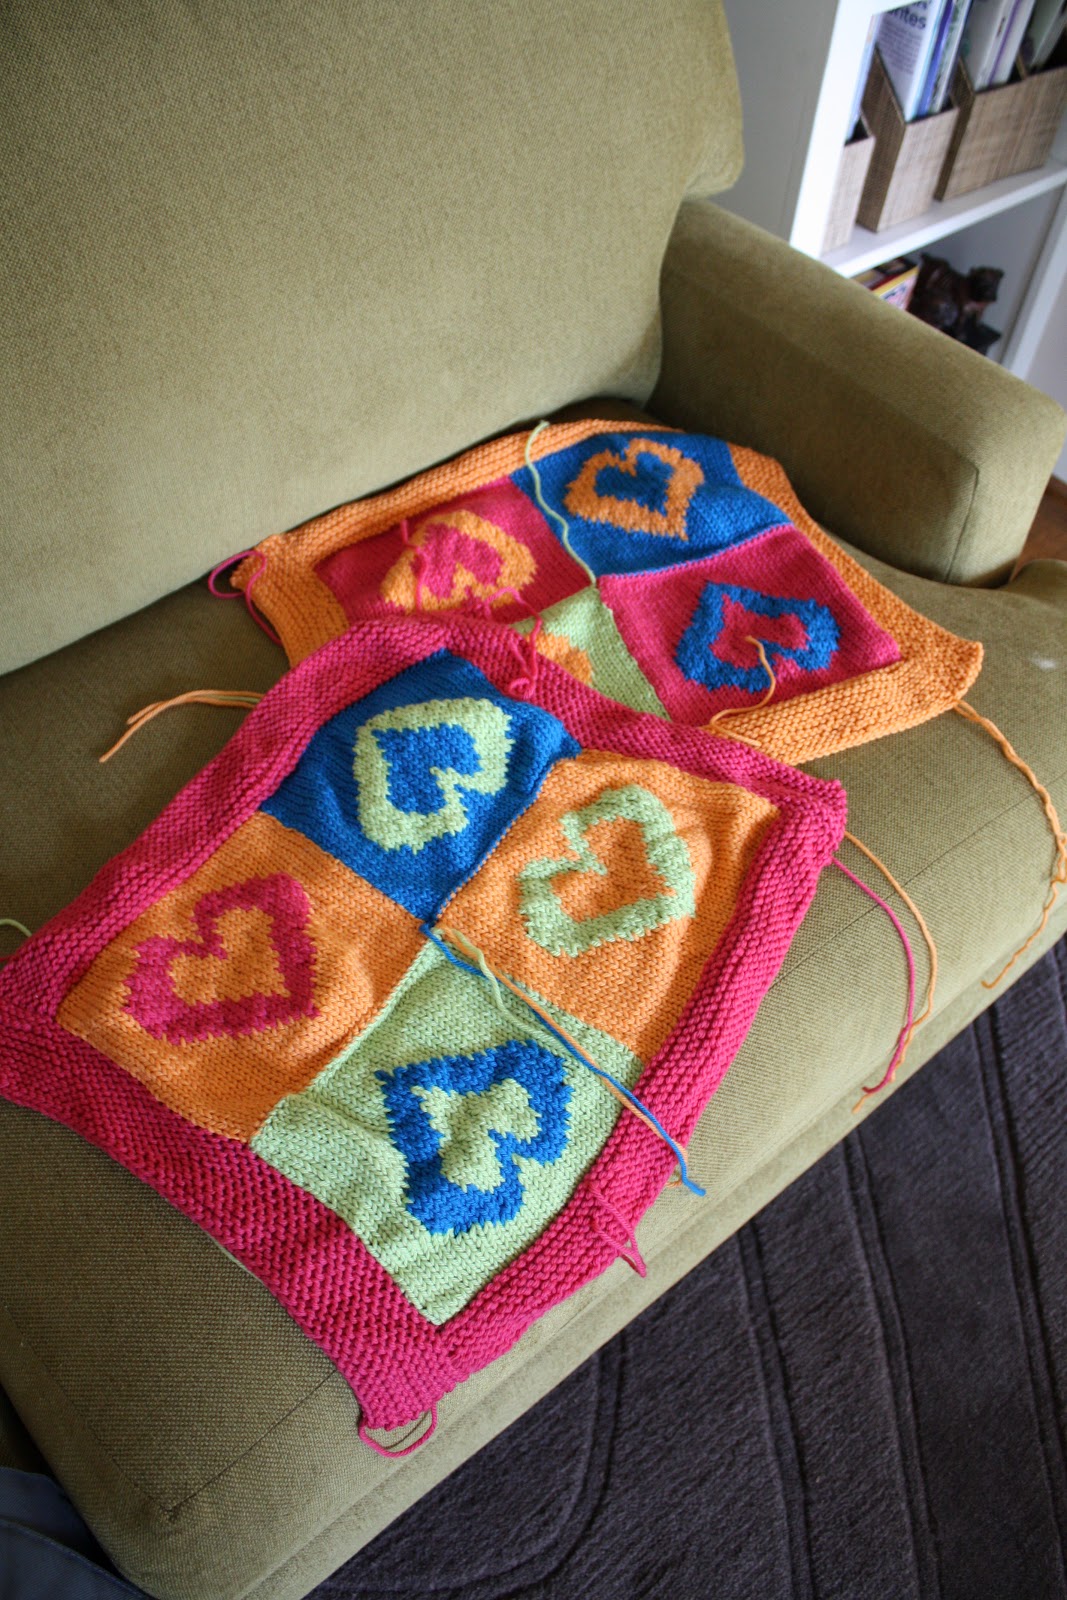
And the last time you saw the many hearts blanket was nearly 3.5 months ago, when I was still pregnant and anxiously awaiting baby boy's arrival ... since then, I've started constructing some of the "blocks" in order to get my mojo going on this project again. It's going to be so cute once I finally finish it ... 


And this is a new project I started in August, but have stalled out on ... it's Rebecca Danger's Terence the Tap Dancing T-Rex! It's the first time I've knit one of her toy patterns, and I've become a big fan. The pattern is so well written and just as adorable as the finished product! I attempted to eek out an entire t-rex using one skein of Cascade 220, despite the fact that the pattern recommended 250-275 yards. And guess what? I ran out of yarn with one more foot left to go ... that's what I get for being cocky! I think I've found a close-enough match in my stash of a similar turquoise-blue yarn for the second foot. It will be visibly different, but I really can't justify purchasing another skein of Cascade 220, especially since I won't be able to get the same dye lot and there will still be a color difference. Arg. Lesson learned!
 
What are you working on? Be sure to check out the other WIPs at TamisAmis and YarnAlong!

calsada crazy


I'm tickled pink by my finished Calsada scarf/shawlette! I cast off last night while watching some nailbiter Olympic swimming races ... this will be perfect for layering under my pea coat this winter, which seems impossibly far off with our current 105 heat index here in Mississippi! A girl can dream, right? This project would have been off the needles much faster if I had ... ahem ... trusted the pattern. One note of caution: the lace edging is very stretchy. You knit it first, separate from the garter stitch body. There are 60 repeats of a 10 row lace pattern ... at around 39 repeats, my thought was "this is gigantic! I'll stop here." I then dutifully picked up stitches along the lace border and began the garter stitch short rows ... and quickly realized that by stopping short, my scarf would be too tiny. Luckily I hadn't gotten too far on the garter stitch short rows, and only had to add onto the lace edging (versus start at square one!). This is my first project using Lorna's Laces, and now I understand what the fuss is all about. I loooove the saturated color, and especially in garter stitch the yarn feels so squishy and soft. Perfect for around the neck! 

Pattern: Calsada
Yarn: Lorna's Laces Shepherd Sock (colorway: tickled pink), 1.6 skeins
Needles: size 6 for lace edging, size 4 for short row body

There are more detail shots of the lace pattern on my Ravelry project page. Don't forget to check out the other WIPs at TamisAmis and YarnAlong!

tickled pink


In my ridiculous need to have a minimum of two active projects going at the same time, I cast on for Calsada last weekend. It's my first shawlette (or shawl of any sort!). The pattern starts with the lace edging, then you go back and complete the body using short rows in garter stitch. The lace pattern is a 10 row repeat, and goes pretty fast since your only knitting 21 stitches at its widest point. I've completed 17 repeats so far ... only 43 to go! I'm so happy to have finally found a "home" for this yarn ... this is my first project using Lorna's Laces Shepherd Sock (colorway: tickled pink). I first cast on for some gloves, but didn't like the way the yarn pooled. Then I attempted a Nympheas, but it just didn't look right ... looks like third time's the charm with Calsada!

giddy up!


Done! Just in time to be gifted to one lucky little girl for her birthday on Monday! I ended up using buttons for eyes--I actually stacked two buttons on top of each other to get this "eye" effect. The bottom layer is a pearly white flat, two hole button. The top layer is a shiny black button with a flat shank in the back. I am sooo happy with how this turned out! The ears are my favorite part--they look so realistic and add so much character! The pattern instructs you to attach them almost folded in half, making a triangle shape with your attachment (instead of a straight, flat seam). I think that definitely was the key to their great shape.

Yarn: Hobby Lobby I Love This Wool (1.5 skeins of Thistle and 50 yards of Pastels)

Be sure to check out the other finished objects at TamisAmis!

plugging away ...


My lace blocks baby blanket is growing! I've discovered that one skein of Caron Simply Soft equates to five repeats (30 rows). What you see here is 2.5 skeins so far--halfway done. Still loving this pattern!

horsing around


My monstrously huge, floppy hobby horse head felted up fabulously! It took nearly six wash cycles (felting is the one and only time I will curse having a high-efficiency top loading machine!), even with a pair of jeans included for extra agitation.


Pre-felting measurements:
Top of forehead to end-of-nose = 14 inches
Top of forehead to beginning of neck = 11 inches

Post-felting measurements:
Top of forehead to end-of-nose = 8 inches
Top of forehead to beginning of neck = 6 inches


It didn't really look like a horse head until I added the mane and forelock. Could have gone a little longer with the mane pieces, but I figure they'll better stay out of the way of some tiny hands and fingers this way.


I used more of Hobby Lobby's "I Love This Wool" for the mane and forelock. This time I used one of their self-striping colorways, "Pastels" (the main color is "Thistle"). I  love how using the self-striping yarn gives me a multi-colored look, without the effort! Not much yardage was needed for the mane and forelock (the pattern estimates about 50 yards). I have about 1/4 remaining in each of the two skeins I used for the actual horse head.


Don't forget to check out the other WIPs at TamisAmis and YarnAlong!

making a big girl room


This week I have a non-knitting finished object to share ... remember when I'd celebrated finishing the crosses quilt and mentioned that my summer project was to create a "big girl's room" for my daughter? This is the end result! If you take a peek at the full-bed photo in that blog post, you'll see a good "before" shot. I had no headboard and boring beige walls ...

Step one was clearly jazzing up the walls with a great shade of purple paint ... then tracking down some furniture. I had no idea how hard it is to find headboards online (well, wooden headboards that is ... there are plenty of great upholstered headboard options out there). The majority of the online furniture offerings consist of entire (and expensive) bed units that are platform style. The platform style is nice in that you can skip purchasing a boxspring for the mattress, but I already had a mattress and boxspring set. I was really really tempted to buy a Jenny Lind bed from Land of Nod (still love that bed!), but it seemed silly to purchase a bed and then have to figure out where to store the no longer necessary boxspring. So a headboard it was! I finally tracked one down on sale at Pottery Barn Teen (the Coraline headboard). I searched a long time for a nightstand with a little character, and this is the Juliette Side Table from Pottery Barn Kids. I fell in love with the turned feet!

While I love the shape and styling of this headboard, I found myself cursing Pottery Barn at several points in this process. The first time was over the color (which I accept as no one's fault but my own, and is one of the perils of purchasing things online ...). I selected the Charlotte Blue color, which looks very classy and mature online. In person ... it's very a greenish blue. Definitely not the shade I was going for, and it clashed with the purple walls. I corrected that situation with some Krylon spray paint in a much funkier, brighter light blue. The second time I cursed? When I realized that the headboard's pre-drilled connecting holes in no way possible would line up with my twin bed's standard metal frame. So much for "compatible with standard bed frames." The holes were way too wide and tall for the frame I had ... a situation which still boggles me, since twin bed mattress measurements are pretty standard.  Thankfully that situation was fixed with a drill to create properly aligned holes. Despite these frustrations, I am soo happy with the end result!


The next big project I had for this room was adding a large, fun decal wall decoration. I'm probably way behind the times on this trend, but I couldn't resist this cute one. It wasn't outrageously priced (especially if you consider the cost of original artwork), and is removable/repositionable so I can easily take it down when she grows out of it. If you take a look at the orginal design, you'll notice that I modified the design a bit. My wall wasn't long enough to apply the decal exactly as designed, with the branch holding the two owls being too long. That was easily fixed by trimming the length of that branch decal, and getting a little creative with placing the "scrolls" at the end of that branch. The decal set comes with a "color by number" style plan that tells you where to locate each sticker, making the process super simple. It took me only a couple of hours to install, and one of those hours was while toting a baby in my front carrier! I am totally in love with the contemporary colors and prints within this set ... I could make a quilt inspired by some of these combinations!


Most importantly, the room has received a stamp of approval from the big girl herself! Check out the other finished objects this week over at TamisAmis!

felting on the fourth

unfelted hobby horse head
Happy Independence Day! We celebrated here with watermelon, sunshine, and chlorine (thanks to a dip in the pool). No fireworks this year--we're all too tired to stay awake for them! I also managed to finish knitting a new project (I have mentioned that I have crafting ADD, right? ahem ... don't worry, my lace blocks baby blanket is still progressing nicely) and get it prepped for felting.

These are the "before" photos ... I know, you must be thinking, wow ... what a giant purple sock! This giant purple sock is an unfelted hobby horse head that I'm making for my daughter's upcoming third birthday. I'm using Hobby Lobby's "I Love this Wool" held double on size 13 needles (talk about a recipe for super speedy knitting!). I need to take measurements, but this thing is ginormous. No matter how many things I felt, I still feel a little bit of doubt at this stage. It's always so hard to believe that something this humongous, floppy, and frankly, ugly is going to magically transform into something fabulous.


The plan is for this guy to make several long, hot, agitating soaks in the washing machine tomorrow. Fingers crossed that I'll have something more horsey to show you soon!

hello world, it's been awhile

      Wow. 16 years of fiber crafting statistics! This chart is deceptive because I only count "yards out" when the project is fin...